No one actually likes to pay their power bill. But with the least interest we cannot stop them to arrive, but what we can do is to make them a little cheaper somehow. Well, you just have to take a deep breath in through your nose and out your mouth. Done? Great. Now you must try to do it again with your nose and mouth covered by your hand. Can you still breathe? Yes, you can, but you will have to work a little harder in order to fill your lungs with air.
Well, your heat pumps act in the same way. By sucking cold air from outside and blowing hot air inside, the filters and coils of your heat pump can become clogged with dust and dirt. A real quick clean every time you do the vacuuming can help your heat pump breathe easier, this heat pump cleaning will improve the efficiency and will add less to your power bill.
Below is the Heat Pumps NOW guide to cleaning a hi-wall heat pump. It does not matter at all if your heat pump is not the same make and model as we have. This would be a general guide to show you how to clean your hi-wall heat pump. If yours is a low-wall model, you do not have to worry at all. We’ll have a guide to help you out soon.
Heat Pump Cleaning

These simple steps can make a big difference to the performance of your unit:
Clean the dust from the filters
As a thumb rule, you must clean your Heat Pump’s filters at the start of every season (every 3 to 4 months). Over time the build-up of all kinds of dust and debris can ultimately clog the air filters and restrict airflow. Well, by cleaning your filters on the regular basis you will make sure that your Heat Pump operates at ideal efficiency and reduces excessive energy consumption in any case.
Removing and cleaning your filters is somehow an easy task that you can do without the help of a technician.
- Always make sure that your Heat Pump is switched off before you even start.
- You must remove the front panel of your unit.
- Try to remove the air filter and clean with a small brush or vacuum with a brush attachment.
- You may also opt to rinse with lukewarm water. If so, you can leave it in a shaded area to dry or use a soft dry cloth.
- After that slide the air filter back into the unit and replace the front panel.
Clean the indoor unit grilles
Any sort of dust would also accumulate on the grilles of your indoor unit. You will have to gently vacuum along these grooves, or you may also gently wipe with a damp cloth for efficient airflow.
Clean the outdoor unit
Did you know before that cleaning the outdoor unit of your Heat Pump Air Conditioning System is just as important as cleaning the air filters of your indoor unit? Well in order to keep your unit running at its perfect you will have to make sure to keep the outdoor unit clear of organic matter such as leaves, weeds and debris then isolate the outdoor unit from the electrical supply before cleaning down the outdoor unit, even if you have turned off the indoor unit. You may find this switch placed adjacent to the outdoor unit. You will have to wash the unit down by using very low-pressure water from your garden hose.
Get your Heat Pump professionally serviced every 12 months
All the mentioned tips above will surely help you to keep your unit working effectively and efficiently. But still in any case they do not replace the need to have your system professionally serviced by an accredited Heat Pump technician. Any professional and certified service will always try and make sure that your system will operate smoothly and efficiently and deliver comfort to your home environment while extending the life of your investment in that machine.
How to clean heat pump condenser coils
Below are the steps for you to Cleaning AC Condenser Coils
Turn off the power supply
Most of the HVAC systems would have a disconnect box that is placed near the outdoor unit. In case you fail to find the outdoor shutoff box near it, you may have to turn the off power at the main service panel just by flipping or even removing the corresponding breaker or fuse.
Try to trim any plant growth around the condenser unit
Always make sure that there is a minimum 2-foot clearance around the whole unit. You will have to be extra careful that you are not planting anything very close to the unit. We would recommend using xeriscaping (“dry” landscaping) techniques around your HVAC unit in order to keep leaves, grass clippings, and other plant debris from clogging up your unit.
Get rid of debris
Get rid of any twigs, leaves, and any large debris from around the unit but with your gloved hands.
Use Brush to remove dust
Try to use a soft brush in order to remove dirt and dust.
Wash away stuck dirt and debris with a garden hose on the lowest pressure setting.
Any sort of strong shower of water can end up bending and damaging the delicate aluminum fins.
Follow the instructions
In case you use a condenser coil cleaner, try to follow the directions that are written on it carefully! Always try and make sure that you cover any electric wires or motors and then you rinse away the cleaner thoroughly. Any sort of left-over cleaner can end up damaging your unit.
After you are done cleaning the unit of dirt and debris, try to inspect the coils for any damage. In case you notice any twisted fins, you will have to try and straighten them with the help of a special “fin comb.” Or you may also contact a local HVAC technician.
If you removed any part of the heat pump, reassemble the air conditioner before turning it back on. Turn the air conditioner back on and you’re good to go!
The Benefits of Keeping Your Coils Clean
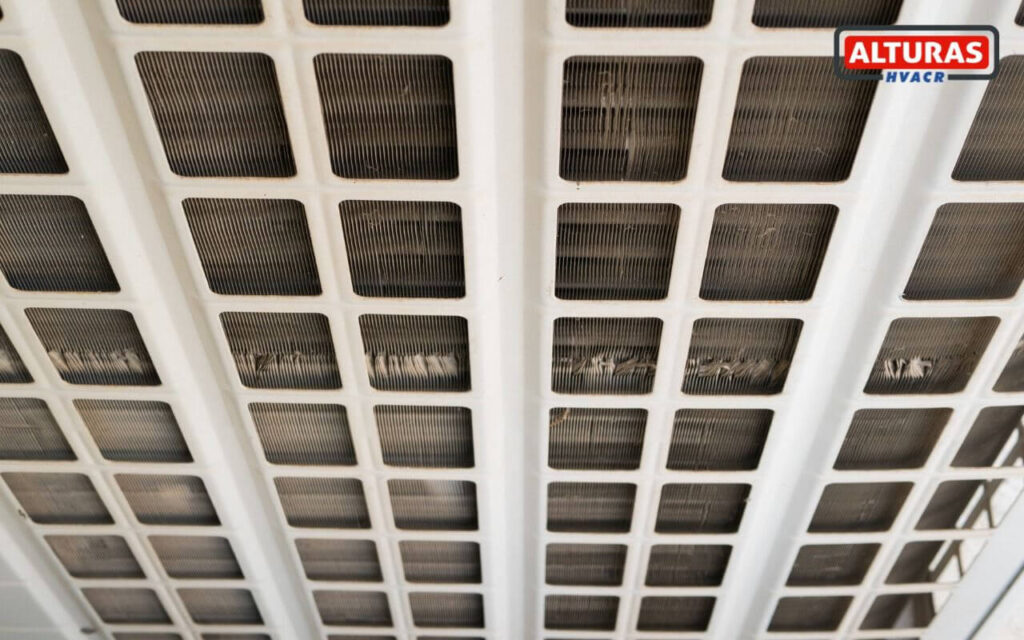
It is very important that you keep the AC coils clean because of the reason that heat can exchange effectively through these coils without getting blocked by any sort of dirt and debris. A lack of routine maintenance on the coils will eventually lead to higher energy bills and a lot of consumption or an overheating AC system. As these condenser coils are on the outside of your unit, they can get hit the hardest by any dirt and grease.
In that case, if the condenser coils are dirty, any sort of heat will not be able to transfer out of your home as easily as it should. And the harder your unit has to work to maintain your desired temperature, the more costly your monthly bills and the higher the likelihood of your system breaking down prematurely.
No doubt that the evaporator coils are located inside your entire unit, they will be still exposed to dust being filtered out of your home. In case the evaporator coils are dirty, they cannot remove as much heat or humidity from your space and will take longer to cool the air.
Condenser coils must stay clean to make sure energy efficiency, indoor comfort, and low energy bills. Dirty coils put an unwarranted strain on your HVAC system. In fact, according to a 2010 Southern California Edison (SCE) Report, dirty condenser coils degrade cooling capacity up to 40% and reduce energy efficiency by up to 60%.
How to clean your Heat Pump yourself

- Shut off the power by breaker panel there are usually two circuits or on outside condenser unit.
- Try and make sure to wear a safety mask, gloves, and goggles
- Remove the filters and the cover that is usually a few screws, covered by pull-out tabs and any other accessories. This can become a tricky part, because all of these models are slightly different from each other, and they also come apart in different ways. In addition, if the machine is older than a year or two, the clips & covers can be brittle. Always be careful not to snap them in any way.
- Try to cover electrical and any exposed circuits with tape/cling-wrap. Also, check if there is no power to the machine by using the current tester or even the multi-meter can do the job for you.
- Cover the wall, lay drop sheet on any area you do not wish to get wet
- Spray coils, blades, and all other parts with an antibacterial, non-acidic cleaner. Leave for 10 – 15 minutes a mild soap & water can work
- After that you will have to rinse with the help of a power washer, you may have to set to low so as to not damage the coil blades but less than 1500 psi. You will also need a bucket for the water runoff, and if you do not have this specialist equipment, you will need some dry rags and a sponge that can soak up any water from the walls & floor. In case you do not have any suitable power washer, brush the solution off and rinse with a sponge)
- Use a flashlight to inspect the blower wheel (look through the bottom vent to the spinning fan cylinder) If it has mold or dirt build-up, rinse with a washer/sprayer, or remove the blower/fan wheel & clean in the bathtub.
- Power wash covers, louvers, screens/filters, or wash by hand if the covers contain electrical.
- Let it dry, and then replace covers and accessories
- Pressure wash outside condenser unit (use low pressure so as not to damage the coils) with chemicals and rinse or you may also use the hose.
Heat Pump Cleaning Cost
As we know that our heat pumps are an integral part of the entire HVAC system. It can also be used for both heating and cooling homes. Any sort of malfunctioning heat pump would fail to perform this important function. From any problem like thermostat problems to tripped circuit breakers, there can be a lot of reasons that your heat pumps can fall apart. Heat pump repair can become really tricky. In case you have any sort of faulty heat pump, you can also consult an HVAC expert, instead of trying to take matters into your own hands and make it worse. Most of these homeowners pay between $250 and $600 for heat pump repair. Your actual cost will always depend on the type of heat pump you are using, and the nature of the problem itself.
Heat Pump Cleaning Kit
For the safe cleaning of your home AC or Heat Pump system. Any of the kits would contain the cleaners that are necessary for one annual clean, for both the indoor unit and the outdoor unit. It may also include an air fresher for the indoor unit and a condensate drain cleaner and disinfectant.
The pump cleaning kit usually contains the following:
- Indoor Evaporator Cleaner & Disinfectant – concentrate
- Outdoor Condenser Cleaner – concentrate
- Indoor Evaporator Cleaner & Disinfectant – applicator bottle
- Outdoor Condenser Cleaner – applicator bottle
- Drain Tabs
- Gel Discs
Final thoughts about Heat Pump Cleaning
The metal fins of the air conditioning coils are very delicate and easily damaged. They should not be brushed, scrubbed, or cleaned with a pressure washer. The pressure provided by a hand sprayer combined with the effect of the cleaning chemical should be enough the clean the coils. Where heavier, more stubborn contamination is encountered a heavier duty chemical cleaner may be needed, not more forceful mechanical cleaning, which will result in damage to these delicate fins. In this situation, any professional air conditioning servicing company may be needed for sure.
Always remember that the cleaning of the fins is no doubt a good thing. Dirt coating will act as a blanket and rapidly ends up reducing the heat exchange capacity of the coil. This is true for both the indoor coil and the outdoor coil. Indoors, dirt build-up can also result in a smelly AC system. This smell will be exasperated if the condensate tray, the drip tray that collects the “runoff” from the coil is also dirty, slime and mold can grow in this area.

