A perfect heating system is considered one of the top facilities that are needed in any home. It could provide all the homeowners with all sorts of comfort during exceptionally cold weather conditions. Investing all your hard-earned money in one of the best HVAC can increase your home’s value considerably. Before investing in a furnace installation project, the homeowner must research the best options and costs associated with them. Having a home furnace does not only come with a lot of comfort and value, but it also lowers energy costs.
Types of Furnace
When we talk about home furnaces, there are three types. These types fall under forced air furnaces. Other categories include solar panel, geothermal, and boiler heating systems.
The three types of furnaces are.
- Electric Furnaces
- Gas Furnaces
- Oil Furnaces
Basic supplies that are needed for Furnace Installation
You will have to make a supply list, whether you are installing a new furnace or you are simply replacing an old heating system in your entire home. Furnace replacement might only need some of the items on the list, but installation will require almost everything.
Basic furnace installation supplies
- Tools: The instruction manual for furnaces usually comes with a complete list of many tools that are required. Usually, you will need tin snips, sheet metal, ¼” sheet metal screws, a wire stripper, wire connectors, cable ties, a cordless screwdriver with ¼” hex bit, pipe dope, and pipe wrenches.
- Adhesives and sealants: you might need some of these tapes from Metal HVAC tape, electrical tape, and silicone RTV.
- Energy-efficient air filters: You will have to make sure that the air filters are a perfect size and not restricting.
- Thermostats and controls: According to your preference. Thermostats might range from simple digital models to many programmable models that may also include smart Wi-Fi models.
- Ductwork: at what place your furnace will have to be installed will actually decide how much ductwork and what exactly supplies you will be needing. Always try to make sure that you must have enough ductwork in order to run to at least one supply and one return vent in each of your rooms, that all will depend on the size of the room in which the furnace has to be installed.
- Registers, grilles, and diffusers: Floor registers, grilles, ceiling diffusers, or louvered wall vents will totally depend on your personal choice as well as how you anticipate setting the entire ductwork.
- Supply lines and fittings: This would include pipes, metal fittings, flow control valves, protection devices, and flexible connectors. You will have to read the whole instructions that is written in the furnace manual before even purchasing these supplies as many of them may be included in the furnace kit.
- Return air box: This is basically a metal box that the furnace would sit on that allows you to hook the ductwork to the furnace. It would also have a place to install an air filter.
- Supply air plenum: You will have to cut holes in this sheet so that the air ducts can supply heated air to the rest of the house.
Furnace Installation Instructions

Here are some of the instructions for your furnace installation
Finding proper placement
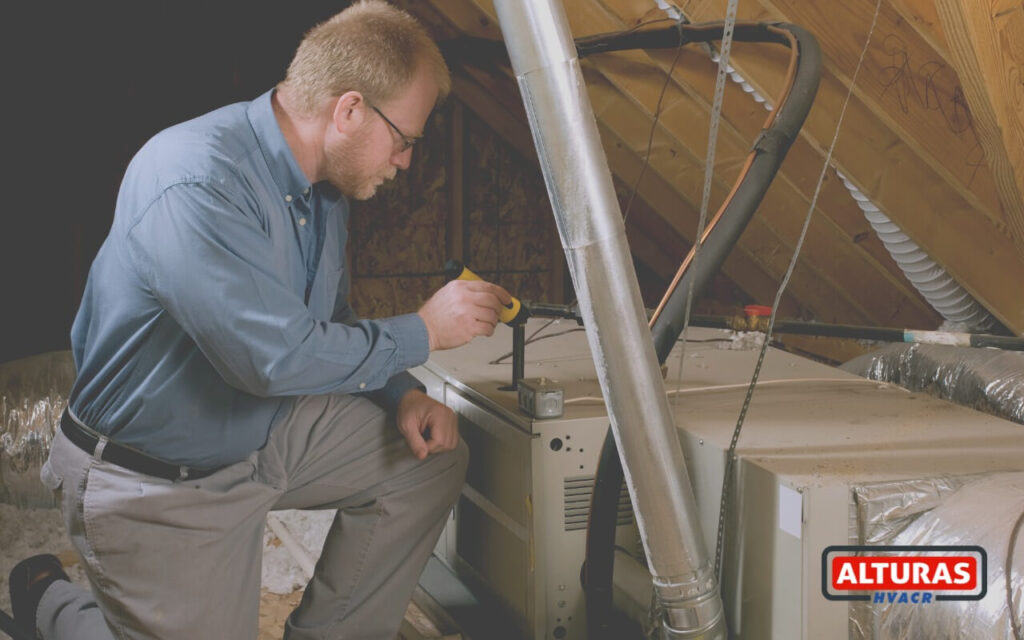
Your new furnace will have to sit on a pad to lessen any unwanted noise that might come when it functions. Nevertheless, it should be at least 2” inches off the floor which would allow the air under it and keep the bottom from rusting out. If this is a fresh furnace install, before even placing the furnace, you will have to keep in mind that your furnace can make extra noise. Basements, closets, and attics are all good places to place your furnace.
Connecting ductwork
Before you set your HVAC unit in any cabinet, you will have to make sure that you know where the return air duct is going to be connected to the unit. In case the hole is not already cut to match your cabinet size, then you can also perform this part yourself. The whole unit will need to drain any condensate; hence, the furnace must have a slight slope that will allow the drainage. You must place the HVAC unit in the cabinet area and connect the ductwork system properly. The ductwork should be connected with the help of a metal foil tape or duct sealant. You should not use duct tape as it can melt or fray and eventually disintegrate.
Venting pipes for drainage
The next step would be to connect the vent pipes. There must be PVC pipes for an inlet and exhaust. You must always make sure that these pipes are clean so the glue will stick to the pipes and stay connected no matter what comes its way. Make sure that the pipes have a 1/4” tilt per four feet so it will drain.
Connecting drain pipes
As stated earlier using a ¾” PVC pipe or hose, connect the condensate drain from the furnace to the floor drain or drain pan.
Preparing the gas supply
In order to install a gas furnace, the next step would be to connect the gas supply. You will have to the shutoff valve and a drip leg, or T valve, right outside the furnace on the gas line. You must spray a gas leak detection solution in order to check for any gas leaks. Do not light in case you see any bubbles. In case you are not experienced with any gas heater installations, it is always recommended to get professional help as this can be dangerous if you do it by yourself.
Finalizing electrical connections
Now you will have to connect the electrical connections. First of all, you must always make sure that you know which is low voltage and which is line voltage. The line voltage must always run from the furnace to the disconnect switch, which must be located approximately three feet from the unit.
Checking the unit
In the end, you will have to start the furnace turn the HEAT on, and let it cycle to make sure that it is working properly. You will have to check the outlet air temperature and the return air temperature so that you can always make sure that it matches the manufacturer’s specifications. This is a crucial step in installing a furnace.
Furnace Filter Installation
Whether you believe it or not, there are many right ways and many wrong ways in order to insert an HVAC furnace filter. In case a filter is not properly installed, it can affect the furnace’s efficiency and cost you a lot of your money to get it fixed. It is very important for you to routinely observe your air filters so that you can prevent them from becoming obstructed with dirt, dust, or debris, and so they continue filtering the air you and your family breathes. Clean filters allow for better indoor air quality and improved energy efficiency.
When is the right time to change the filter?
When it’s time to change your filter, you must always follow these tips to make sure that it is achieved properly:
- Locate the filter. In most of the furnaces, the entire filter will be adjacent to the furnace, and it would be inserted where the ductwork will meet the furnace.
- You will have to find out where on the furnace you can see the filter air box. You will have to stand in front of the furnace so that you can look for the ducts. You will then have to pull the old filter out and dispose of it.
- On the new filter, you will have to find the arrow that would be indicating the proper airflow direction. These arrows must be facing toward the furnace and away from the return duct that pulls the air in need of heating or cooling. It would be smart if you could draw the airflow direction arrow with a permanent marker on the furnace or ductwork. It would also be good to label the new filter with the same date when you are changing it that would help you in keeping track of how long it has been between changes.
- After that slide, the new filter in with the arrow is pointing toward the furnace.
- Replacing your air filter is not difficult at all. So you must remember that air flows from your ducts, through the filter, and into the furnace. The arrows on the filter should always be pointing toward the furnace.
- The furnace or the filter air box most likely will contain the correct filter measurements for replacement filters or just check the filter itself.
Furnace Humidifier Installation
The process of installing a humidifier on a furnace in order to protect your family from dry air is comparatively easy, in order to install this system, a hot or cold-water pipe is very important, this is the place where the water solenoid of a forced-air furnace humidifier is typically connected to, in order to draw water. Some of these humidifiers are heated by the supply air, they add the perfect amount of moisture to the surrounding air because they are installed in the return-air duct. The installation process uses a bypass duct in the humidifier so that they can reintroduce to the air going to the house.
Steps for Installing a Furnace Humidifier

Step 1 – Marking & Cutting the Hole
This process would make the use of a template and the marker in order to figure out a hole in which the house humidifier will have to be installed, all these templates and instructions are beforehand provided by all the manufacturers of these humidifiers. To begin with, the outline is drilled at the corners, then with the instruction from the manufacturer, the hole is cut out with aviation snips. Before even drilling the screwed hole, the mounting plate must be in a perfect position, then it is attached to a mounting plate that has sheet metal screws.
Step 2 – Mark & Cut Outline of the Humidistat
The instruction manual from the respective manufacturer is always used to know the location of the humidistat, they are usually connected on the cold air return at least 1 foot above the humidifier. Once the hole is cut out, you will have to connect the low voltage and safeguard the thermostat with the supplied tin screws.
Step 3 – Install Electrical for the home Humidifier
By following all the instructions in the manufacturer’s manual, you will then have to connect the humidistat to the furnace control. Some units would make use of a step-down transformer 120v to 24v, shut down the power if you have not already done the wiring. After that, you can wire the humidistat and install the transformer properly.
STEP 4 – Connect the Furnace Bypass Humidifier
On the humidistat, you will then attach the humidistat to the solenoid valve with the help of the correct size of the nut, attach all these nuts and the wire ends and turn the nuts till they have become tight remember not to twist the ends of the wire.
STEP 5 – Install Water Line to The Humidifier
The installation of a saddle valve on a water line is very important if local code is allowed the tapping of the water line directly, and then it would run a line to the humidifier, afterwards you will have to use the compression fitting to make it rapid. Remember that the saddle valve would not be allowed to turn off the water line and install at-fitting. After that, you can install a bypass line to create water vapor in the HVAC system.
Cost of New Furnace Installation
The new furnace installation would cost you around $1,500 to $6,500, that only depends on the model that you would choose. The average cost of installing a mid-efficiency furnace is $1,500 to $2,500. Mid-efficiency furnaces have an annual fuel utilization efficiency (AFUE) rating of 80% to 89%. They usually vent through masonry or a metal chimney. In case you have any existing chimneys that may need to be upgraded when you install any new furnaces. Installing a high-efficiency furnace costs $3,000 to $5,000. They have an AFUE rating of 90% to 97%. High-efficiency furnaces vent through the wall via PVC pipe.
Cost Factors to Consider
Other than the up-front installation price, here are some other things to think about:
1. Energy Source
The three main fuel sources for furnaces are electricity, natural gas, and oil. You will have to look up the costs of these fuel sources that are available in your area in order to calculate how much you would pay to run each type of this furnace. In case you want to switch to a different energy source for your new furnace, there may be some extra labor costs that are involved in the installation.
2. Efficiency
High-efficiency furnaces would cost you more to repair because they have more complicated parts than mid-efficiency furnaces. In case you have an older, inefficient furnace, upgrading to a mid-efficiency furnace may be enough to lower your energy bills.
If you want to find a balance between energy efficiency and installation cost, you must go for a furnace with an AFUE rating of 90% to 95%. The repair costs in this range are lower than furnaces that are rated above 95%.
3. Furnace Size
When deciding what size furnace you would need for your home, the technician will take into account your home’s landscaping, construction, and square footage. Any furnace that is too small will not properly heat your home in the best way possible, and the one that is too large can also cause issues such as short cycling.
4. Installation
You can purchase your furnace and pay for installation separately. The cost to install a new furnace is between $950 and $1,150, and the process takes about 10.5 hours to complete. Installing a furnace is not a DIY job; it requires specific knowledge and training, which is why installation technicians are required by law to be certified.
5. Ongoing Costs
In addition to annual maintenance, you will also need to change your furnace’s air filter every one to three months regularly. Some furnaces may have a filter that you can clean on a regular basis. Changing or cleaning the air filter and scheduling regular maintenance can help you save money on the overall operating cost of your system. These maintenance tasks are critical for maintaining energy efficiency and warding off problems.
The average cost of a furnace tune-up is only $100 to $125 — much cheaper than the cost of a major furnace repair. Air filters are inexpensive, ranging from $4 to $30.

